Winter

Pea & Mint Risotto

Going green in celebration of Earth Day!

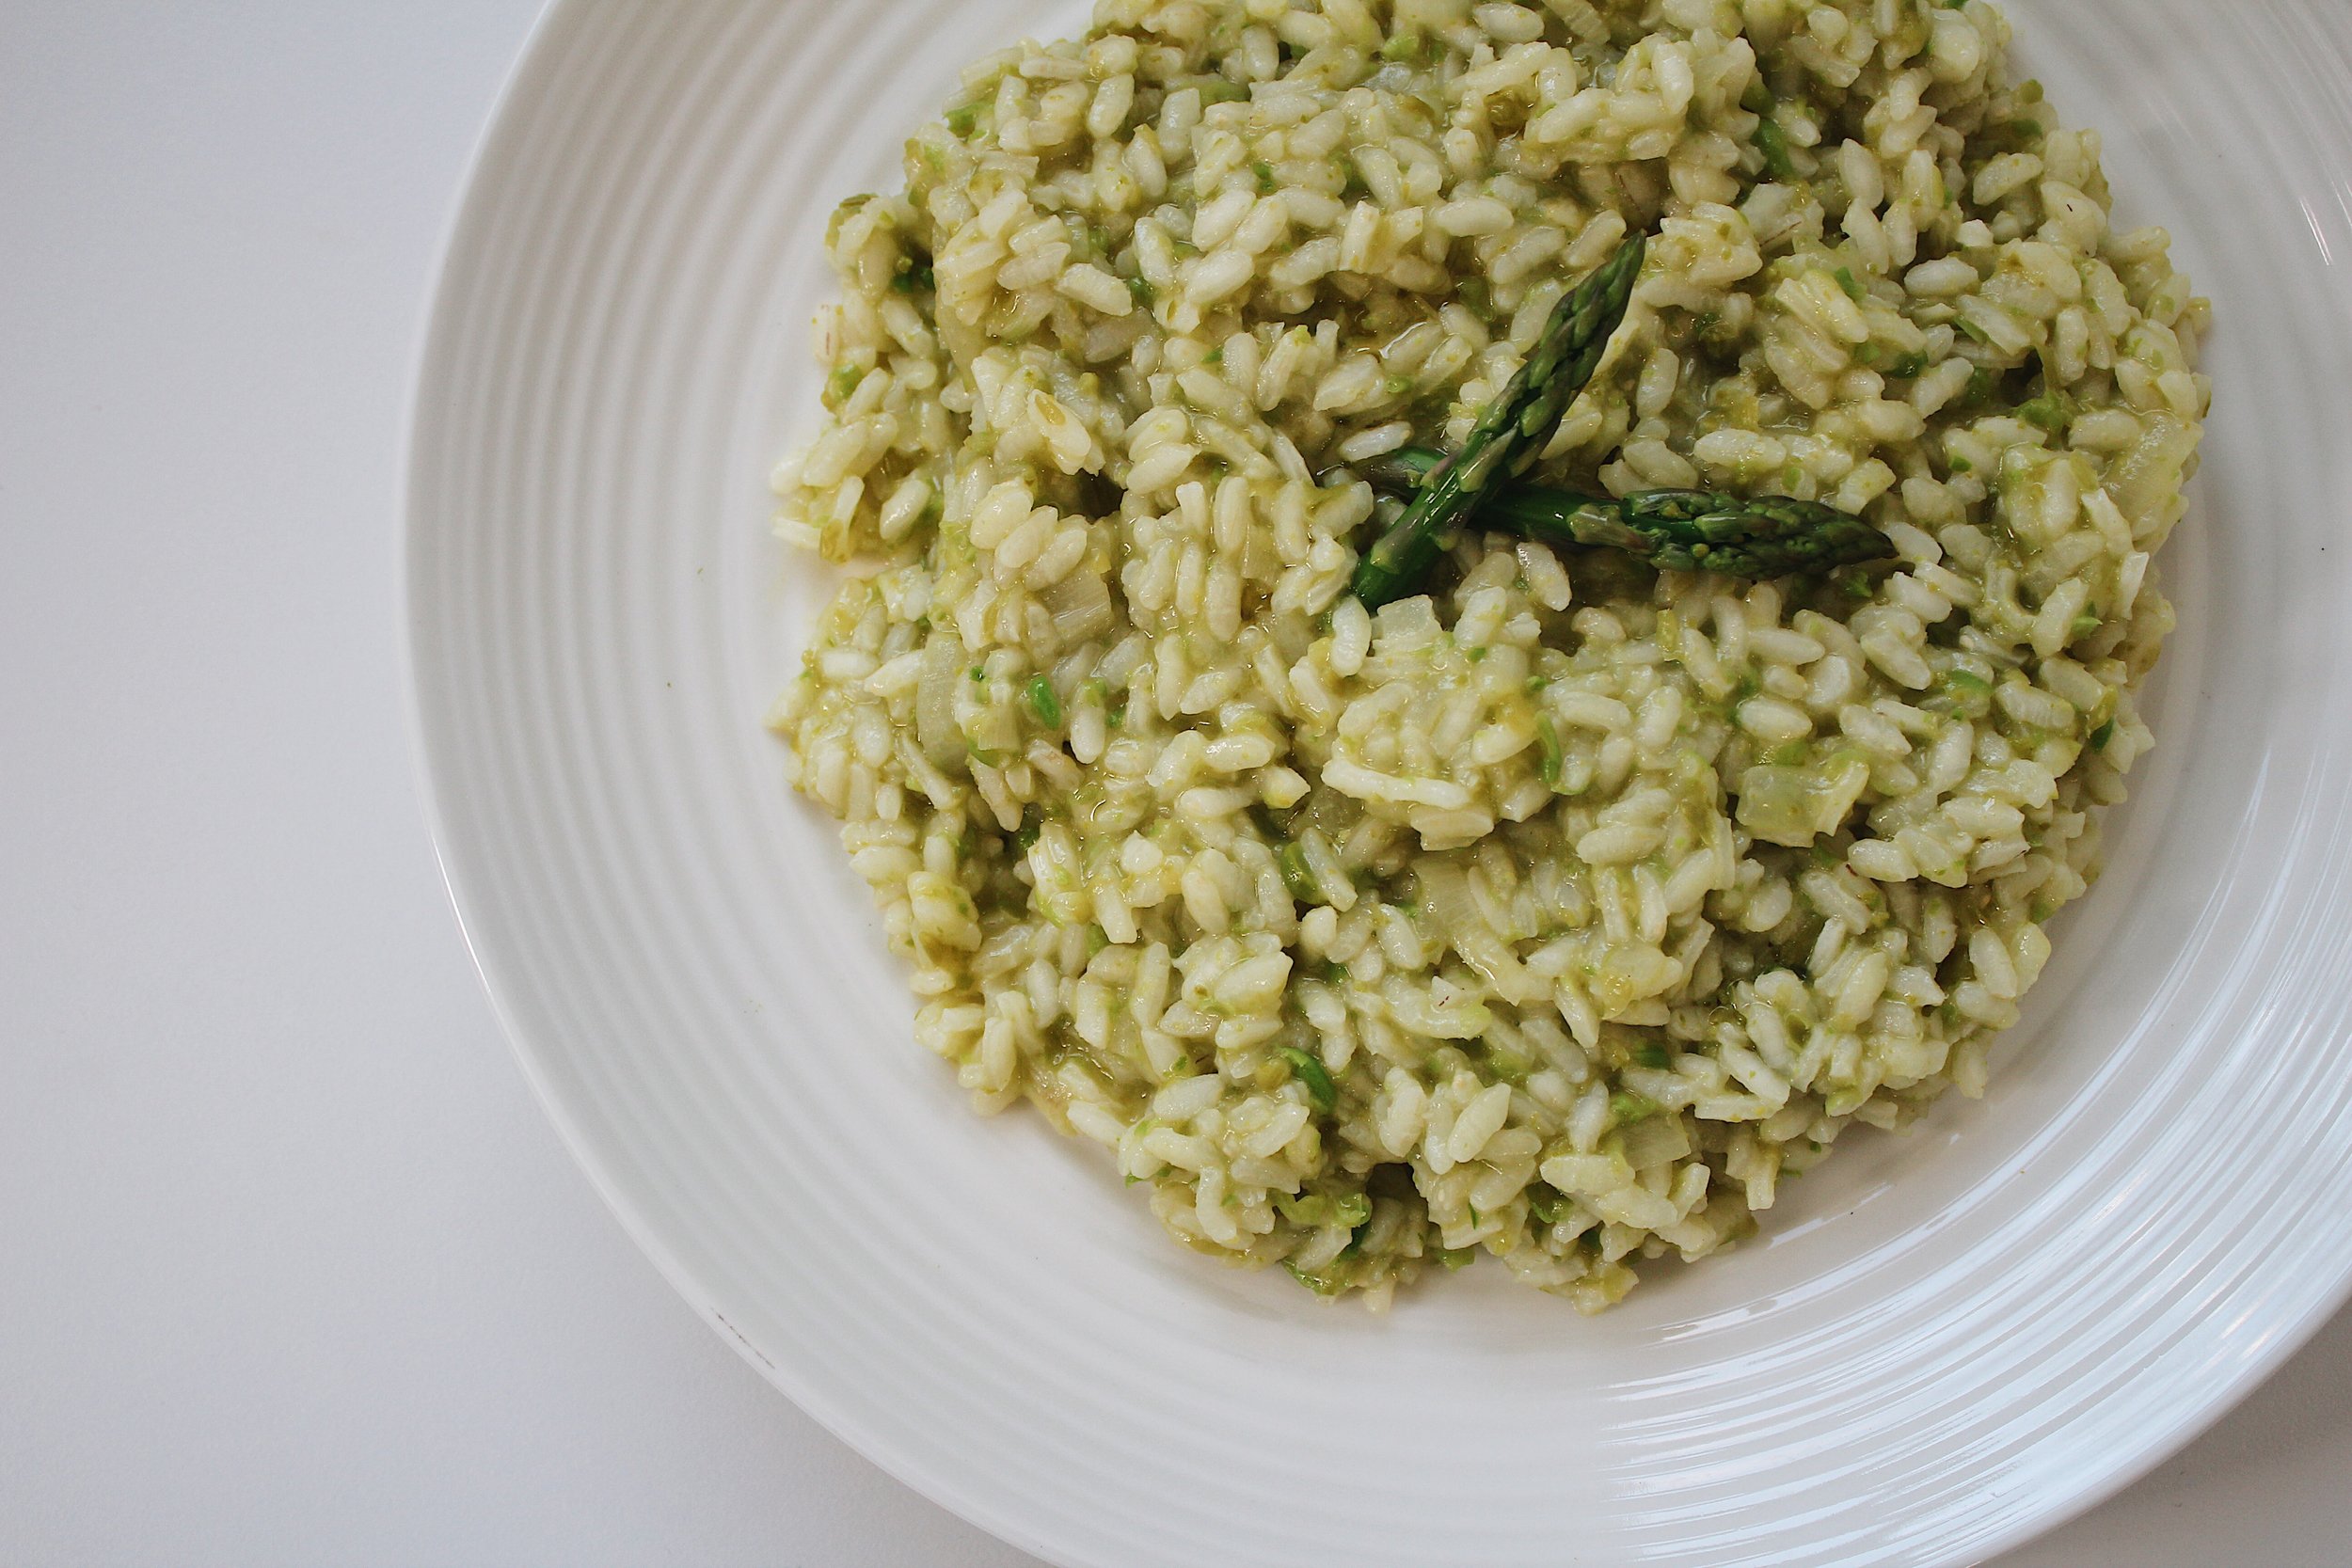
This fresh and vibrant green Pea and Mint Risotto is luxurious while still being a light dish. It’s perfect for a weeknight meal, as it is very quick to whip up.

When the warm weather arrives, my backyard gets taken over by mint! All Spring and Summer long I have plenty of mint to cook, bake and make tea with. So this recipe helps utilize my garden’s herbs and celebrate this wonderful day! GO GREEN!


Ingredients 

  • 1 medium onion, finely chopped

  • 2 tablespoons butter

  • 1-½ cups uncooked Arborio rice

  • 4 sprigs fresh mint

  • 4 ½ cups reduced sodium chicken broth

  • ⅓ cup white wine

  • 1/3 cup frozen peas, thawed

  • ½ cup parmesan cheese

Recipe

  1. In a small saucepan, heat the broth and keep warm.

  2. In a large nonstick pot, sauté onion in butter for 2-3 minutes or until tender.

  3. Add the rice, cook and stir 2-3 minutes. Add the wine, cook and stir until all of the liquid is absorbed.

  4. Stir in heated broth, a ladle at a time, stirring constantly. Allow the liquid to absorb between each addition.

  5. Meanwhile, in a blender, add the peas with a splash of water and blend into a puree.

  6. Cook until risotto is creamy and almost tender around 20 minutes. Add the sprigs of mint & the pureed peas. Cook until heated through.

  7. Remove the mint sprigs.  Add Parmesan cheese and serve immediately.

    Garnish with pea shoots or asparagus for an added bite.


Citrus and Avocado Salad

I live in an area where I am lucky to have four seasons. My least favorite of all of them  has to be winter, from the cold to the mountains of snowfall each year, there is nothing I like about winter, except for citrus season.

Interestingly enough, citrus is at its sweetest during the winter. As it may be obvious, these citrus fruits are grown in temperate regions, such as California, Florida and Texas. Luckily for us, we can pick them up at our grocery store and celebrate the citrus season as if they were grown in our own backyards!

The best way to use citrus fruits in your meals during this season is to make them the star of the show. So, for this recipe, I wanted to keep it simple and compliment the balance of the sweetness of the fruit by adding  salted pistachios and  making a vinaigrette with avocado oil and lime. 

 This salad is a perfect pairing with fish, such as a grilled salmon or a great side to brighten up a steak dinner.

My Portuguese Mother // Citrus and Avocado Salad
My Portuguese Mother :: Citrus and Avocado Salad.JPG
My Portuguese Mother // Citrus and Avocado Salad
 

Ingredients 

  • 2 cara- cara oranges, peeled & sliced

  • 1 grapefruit, peeled & sliced

  • 1 blood orange, peeled & sliced

  • 1 avocado, peeled & sliced

  • ¼ cup avocado oil

  • 3 tbsp. fresh lime juice

  • 1 tbsp. honey

  • 2 tbsp. crushed pistachios

Recipe

  1. Using a paring knife, remove peel and white pith from citrus, being careful not to remove too much of the flesh. Slice citrus into ½"-thick rounds. Cut the avocado into slices. Transfer to a medium serving platter.

  2. For the vinaigrette, using a small bowl, whisk avocado oil,  lime juice, and honey together. Drizzle over the salad.

  3. Scatter pistachios over the salad, finish with sea salt and ground pepper. Serve immediately.

Brownie Hearts

Who doesn't love a fudgy brownie!?

These fudgy brownies are so quick to make and come out perfect each and every time! Crispy on the outside and chewy on the inside, this recipe from The Smitten Kitchen is my ultimate favorite brownie recipe!

 Since Valentine’s Day is tomorrow, I decided to use a heart cut out for these brownies and packaged them up in a sweet festive box to gift to my loved one(s).

I used a 1 ½-inch heart shaped cutter, but you may use any size you want or just cut them into squares, if you wish.

There is nothing quite like receiving a homemade gift, so whip these up, give them away or keep them for yourself!! Indulge! 

My Portuguese Mother // Brownie Hearts
 

Ingredients 

  • 6 ounces unsweetened chocolate, roughly chopped

  • 1 cup unsalted butter

  • 2 ⅔  cups granulated sugar

  • 4 large eggs

  • 2 tsp vanilla extract

  • 1 tsp flaky sea salt

  • 1 ⅓  cup all-purpose flour

Recipe

  1. Preheat oven to 350°F. Grease and line a 9 X 13-inch pan with parchment paper, leaving a 1-inch overhang.

  2. In a medium heatproof bowl, melt chocolate and butter together in 30-second intervals in the microwave until the butter and chocolate are completely melted. Stir until smooth.

  3. Stir in sugar, then the eggs. Add the vanilla and salt.

  4. Pour batter into the greased pan, spread into an even layer.

  5. Bake for around 20-25 minutes, or until the toothpick comes out clean.

  6. Allow to cool.  Using the parchment paper overhang, remove the brownies out of the pan. Cut out the brownies with 1- 2-inch heart-shaped cookie cutter or whatever sized heart cookie cutter you have.

    Recipe by Smitten Kitchen


Piri - Piri Chicken & Crispy Potato Chips

One of the most classic Portuguese dishes is Frango Assado [Roasted Chicken].

Served with a side of rice, or crispy potato chips, this signature meal is found on every menu in Portugal. What makes it so famous is the way it is prepared, with lemon, olive oil, garlic, and the secret ingredient, Piri-Piri.

Piri-Piri peppers made their way to Portugal by ships from Mozambique and Angola, former colonies of Portugal. These hot peppers soon become a staple in many Portuguese dishes such as this one.

The peppers add a fiery note to this chicken that you’ll be wondering why you haven’t tried them out before.

They are also known as birds eye chili and are easily found in Portuguese specialty stores, but if you can't find them, substitute them for regular chilies, or cayenne pepper.

My Portuguese Mother // Piri - Piri Chicken
My Portuguese Mother // Potato Chips
 

Ingredients 

  • 1 whole chicken, spatchocked

Piri- Piri Sauce

  • 10 Piri-Piri Peppers (red eye or any other red chili peppers)

  • 100 ml olive oil

  • 4 garlic cloves, minced

  • 2 tsp. paprika

  • Salt & Pepper

  • Large bunch of parsley, plus more for serving

Crispy Potato Chips

  • 1½ pounds russet

  • Ice water

  • Vegetable oil, for frying

  • Salt and pepper

Recipe

Piri- Piri Sauce & Chicken

  1. Mix the chilies, olive oil, garlic, paprika, parsley, and salt and pepper, until it is all combined. Using a blender, blend half the mixture for the marinade, and preserve the half unblended mixture for basting.

  2. Place the chicken breast side down. Using kitchen scissors, cut the right side of the backbone, and repeat along the left side. ( you may save the backbone for future chicken stock or discard). Open the chicken, and turn over. Flatten the breastbone with the heel of your hand so that the meat is all one thickness.

  3. Place the chicken in a plastic bag or in a  large tray, pour half of the sauce over the chicken and allow it to marinade for an hour.

  4. Preheat the oven to 350 F.

  5. Place the chicken on a baking tray. Tuck the wings under the body of the chicken.

  6. Roast the chicken for a 1-1 ½ hour. For the last few minutes, turn on the broiler to crisp the skin of the chicken. Keep a close eye so the skin does not burn.

  7. Remove from the oven, baste with the remaining sauce.

  8. Garnish with leftover parsley, serve alongside, crispy fries, salad or rice.

 Crispy Potato Chips

  1. Using a mandoline or sharp knife, carefully slice potatoes about ⅛” thick. Place them in a large bowl of ice water. Allow the potatoes to sit for 30 minutes. Once the 30 minutes are done, drain, and pat dry.

  2. Heat up a heavy pot with a thermometer; pour in oil. Heat over medium-high until thermometer reaches 300°F.

  3. Working in batches, fry until golden brown and crisp, turning occasionally for an even cook, about 5-7 minutes per batch. Using a slotted spoon, transfer to a paper towel–lined wire rack. Season with salt and pepper.


Heart Surprise Cupcakes

Valentine’s Day is only 5 days away and what a better way to show your sweetheart how much you love them than by making these cute cut out heart cupcakes.

I was inspired by the blog A Cozy Kitchen, which is one of my favorite blogs! Adrianna, not only makes the most delicious meals but also, photographs and presents them beautifully!

When I saw this cut-out heart cupcake, I knew I had to give it a try. I used her method and red velvet cupcake recipe for the cupcake.

I adapted it with my favorite vanilla cupcake recipe that is the ultimate go-to cupcake recipe! This vanilla batter creates a fluffy cupcake, that is an excellent pairing with the red velvet heart and of course, my favorite frosting of all time, cream cheese frosting.

The surprise heart will leave your loved ones speechless!

heart-cutout-cupcakes
heart-cutout-cupcakes3
heart-cutout-cupcakes4
heart-cutout-cupcakes6
heart-cutout-cupcakes7

Ingredients

Inside Heart

  • 1 1/4 cup all-purpose flour

  • 1/4 cup cocoa powder

  • 1/2 teaspoon baking soda

  • 1/2 teaspoon salt

  • 3/4 cup buttermilk shaken

  • 1/2 cup unsalted butter, room temperature

  • 1 cup sugar

  • 2 large eggs

  • 8 drops food coloring, less if using gel

  • 1 teaspoon pure vanilla extract

Vanilla Cupcake

  • 1 1/2 sticks unsalted butter, room temperature

  • 1 1/2 cups sugar

  • 2 eggs

  • 2 teaspoons pure vanilla extract

  • 2 1/2 teaspoons baking powder

  • 1/4 teaspoon salt

  • 2 1/2 cups flour

  • 1 1/4 cups milk

Cream Cheese Frosting

  • 1/2 cup unsalted butter, room temperature

  • 8 oz. cream cheese, room temperature

  • 3 cups powdered sugar

  • 2 teaspoon vanilla extract

  • 2 tablespoons heavy cream

Recipe

Inside Heart

  1. Preheat oven to 350 degrees F. Grease and line the bottom of a sheet baking tray with parchment paper.

  2. In a medium bow, whisk together the flour, cocoa powder, baking soda and salt.

  3. In an electric stand-up mixer, with the paddle attachment, add the butter and sugar, beat until light and fluffy. Beat in the eggs, one at a time. Pour in the buttermilk, red food coloring and vanilla.

  4. Gradually beat in flour mixture on low speed until just combined.

  5. Pour the batter into the baking tray and spread the cake batter into an even layer. Transfer to the oven to bake for about 25 to 30 minutes, until a skewer comes out clean.

  6. Allow to cool completely. Stamp out hearts using a 1 1/2-inch heart cookie cutter.

Vanilla Cupcake

  1. Preheat to 375 degrees F.

  2. In a medium bowl, whisk the baking powder, salt and flour. Set aside.

  3. Using an electric mixer, beat butter and sugar until light and fluffy. Add the eggs, one at a time. Beat in vanilla. Turing the mixer on low, beat in the dry ingredients. Add the milk, and beat again until the mixer is just combined.

  4. Fill each cupcake tin with two tablespoons of batter, about halfway. Carefully, snuggle cut out hearts in the center of each cupcake batter, make sure to face them all the same way.

  5. Transfer to the oven to bake for 20 minutes, or until a toothpick inserted into the white cake comes out clean. Cool in the pans on the wire rack.

Cream Cheese Frosting

  1. Using an electric mixer, beat butter and cream cheese until combined. Carefully, add the powdered sugar and beat until light and fluffy. Add the vanilla extract and heavy cream. Beat again until all combined.

  2. Before frosting, it's important to give yourself an indicator to know which way to cut the cupcake. I lined them all in the same direction before frosting and then used a my sprinkle on top of the frosting to remind me which way to cut.

  3. Enjoy the surprise !


Adapted from A Cozy Kitchen